The knit stitch is the most basic component of knitting, forming the basis of most projects We recommend the Snood Operator Kit. It's a good beginner kit and uses only the knit stitch.
Each knit stitch will look like a little ‘V’. If you use only knit stitches, you're working in garter stitch. You can also combine knit stitches with purls, to work in stitch patterns like ribbing and moss stitch. Referred to as 'k1' in traditional knitting patterns. Once you have mastered this stitch, you will be able to tackle other stitches such as stocking stitch and 1x1 rib.
RECOMMENDED KIT We recommend the Snood Operator Kit. It's a good beginner kit and uses only the knit stitch.
Why wait! Get 10% Off a Snood Operator which is an ideal knitting kit for your to use your knit stitch technique using the following discount code:
howto10%off
Only valid until the end of September 2018 in the UK only. One use per customer. Not valid with other Promotions.

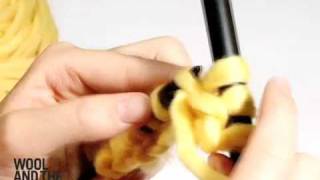
Insert the right needle into the first stitch knit-wise. Make sure that you stick the needle through the stitch carefully, so you don't accidentally catch any extra fibres.
It's important that you insert the needle from underneath, upwards - not the other way around.

This is what it should look like from the back - almost like a cross.

With the right knitting needle still in the first stitch, wrap your yarn around the right needle clockwise. The left needle remains as it is.

With the yarn wrapped around your right needle, scoop the right needle towards you, under the stitch on your left needle.
It's important that the wrap around the right needle remains on the right needle.
If you accidentally drop the wrapped yarn off the needle, simply repeat step 1.

Great work Gang, we are almost there! Now, move your yarn towards the top of the left needle and gently release the stitch off the left needle.
Note: You *have* to release the stitch over to the right knitting needle. Not doing this is a beginner's mistake and means you end up with too many stitches on your needle :)

Ta-da! Voila! You have successfully knitted the knit stitch!
You should now have a knit stitch on your right needle, and the stitch count should remain the same across your two knitting needles.
Congratulations!

Keep repeating step 1-6 until you have one more stitch on the left needle. Knit this final stitch in the same way as above and you should then have all stitches moved from the left needle to the right needle. A successful row of knitting the knit stitch!
A good piece of advice is to count the number of stitches on your needle at the end of each row, especially if you're a beginner knitter, just to make sure that no rogue errors have slipped in.

Knitting every row like this, creates garter stitch, used in scarves such as our Foxy Roxy. It'll look nice and pretty, like this. Well done!
If your order amount is $40.00 or more, we'll ship for free with standard shipping. View full price shipping costs
You may incur customs charges on orders over $200, if you are asked to pay customs then simply email info@woolandthegang.com with your receipt and we'll refund you the charge back.